I finally was able to paint my kitchen yesterday, yay me! Time has been a precious commodity lately so it had been little bit's and pieces of scraping wallpaper, then priming and priming and priming again until I was able to have a chunk of time to actually devote to painting. It's difficult for me to only do little spurts because I am a paintaholic, there I said it! I know many people hate painting, but not me, I love it! For me it is like meditation, it's relaxing, it's calming, it's one of my forms of art and I am moving forward to taking my faux finishes to a full time career I've only just taken on jobs by word of mouth or "here and there" now it's time to actively pursue it and go for it, but that's a different post, I'm getting off topic.....
In the kitchen I have bead board wainscoting with a small amount of wall space above, I decided I would do a
ONE COLOR color wash, which is a simple faux finish but gives a nice "dreamy" look and not so rigid as just a straight painted on color. I am a fan of BEHR paint put out by Home Depot, but I really prefer to use tints and professional paints that I purchase through faux companies such as
Fauxeffects, these products are pricey and I don't use them for myself unless I know I'm not going to change my mind 2 months later. :) SO for my kitchen I used BEHR "MIDDAY SUN" which was scanned from a DUNN-EDWARDS paint mixed with BEHR glaze.
STEP ONE: Make sure your walls are prepped; meaning they are cleaned, preferably with something such a TSP, which you can get at Home Depot (wear a mask), primed with a good surface primer that blocks stains or bleed throughs.
STEP TWO: If you were doing a two color color wash, you would roll on the base color first, but I was only doing a one color color wash so we are skipping a step. You want to use
1 PART GLAZE to 4 PARTS PAINT 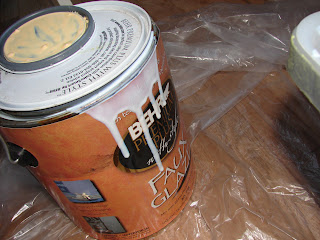
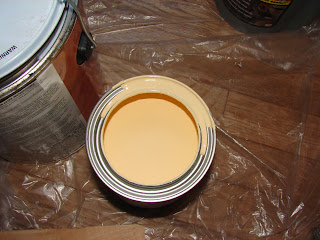
Mix well together in your bucket or pan, the paint color should remain the same, using too much glaze will lighten the color a bit, if that happens add a little more paint.
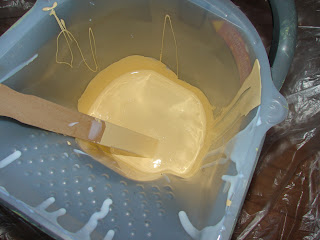
Glaze is used to extend the "workable time" of the paint, which means you can manipulate it on the walls for a longer period of time before it dries.
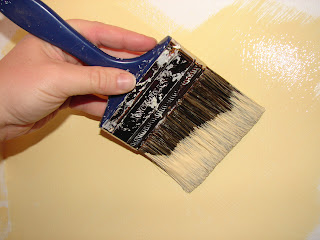
STEP THREE: "Load" your brush, dip it into the mixture about 1/4 of the way then wipe off about 1/2 of the paint back on to your tray or bucket, you don't want your brush dripping. Now here comes the scary part (cue gunslinger music) where to start? Don't be afraid, the best place to start is the top left hand corner of the wall and work down and over right. Holding the paintbrush is important, many people think you have to hold it like a pencil, that really won't give you the control you need, the best way to hold a paintbrush is with the thumb on one side and all 4 fingers on the other. For the color wash, you are going to be at about a
35 degree angle and use haphazard crisscross strokes.
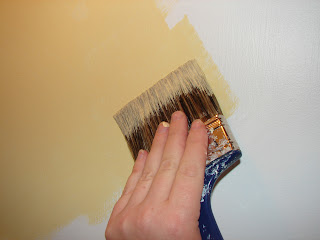
You want to make sure as you are traveling along the wall that you move fairly quickly and that you leave a "wet edge" to come back to. A wet edge is just that, say you are doing a 10 foot wall and you are working down, by the time you get back up the paint will be dry leaving an obvious "seam". If you leave a good amount of wet paint there, called a wet edge, it will allow you to come back and work that area so it will be seamless. Say it with me "WET EDGE IS MY FRIEND" :)
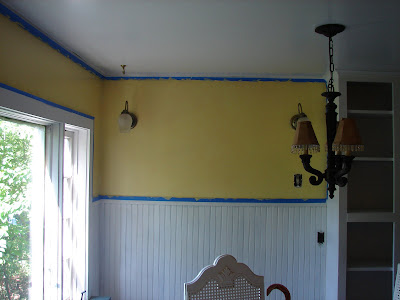
Here is a picture of one of my walls after the one color wash, I think it's difficult to see the actually cross stokes but you can see the general "mottled" look
......AND because I never know when I'm going to change my mind, I decided I didn't really like just one coat and didn't want to keep the "mottled" "haphazard"look. I repeated the process with a second coat, as you can see it's a much more uniformed version, almost like a straight paint but when you get closer you can see the random brush strokes.
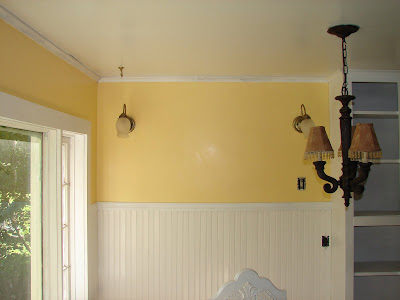
So there's your "To color wash (or not)", a wash can really add depth to a wall and if you have less than perfect ones, a decorative paint treatment is a great way to camouflage the problem.
Today you will find me painting more of the bead board, molding and baseboard in SWISS COFFEE, speaking of coffee........
*muah*


4 comments:
Michelle ~ I linked to your blog through Cindy's My Romantic Home. Your blog is lovely and inspirational. I had to chuckle about your doggy getting gray hairs. So cute. Your photos are lovely.
Alexandra
silverbellcottage.blogspot.com
Hi Michelle,
I love the paint color you are using. I can't wait to see every thing done. I have to confess, I too am a paint-a-holic. I have been know to paint and repaint walls on a regular basis :-).
Penny
p.s. I emailed you about your last post......let me know if you got it.
That was a great explanation of color washing. Swiss Coffee sounds like a yummy color. Can't wait to see it all done!
Manuela
Wow, great explanation and illustration on color washing! Your blog is lovely! And very inspirational.
Post a Comment